vCenter 6.5 crash

С чего начнем … решили обновляться с vSphere 5.5 до 6.5.
Первые полгода был полет нормальный. Потом прилетела бага от HP(читать тут), а вот сейчас новая бага —  стал отваливаться vCenter, причем даже до авторизации, просто до обращения к странице с выбором клиента
Ошибка примерно такая:

503 Service Unavailable (Failed to connect to endpoint: [class Vmacore::Http::NamedPipeServiceSpec:0x00000032401982b0] _serverNamespace = / action = Allow _pipeName =\\.\pipe\vmware-vpxd-webserver-pipe)

помогал только перезапуск сервиса VMware vCenter Configuration Service(ну а  он тянет за собой перезапуск всех сервисов VMWare) ну или всего сервера.

и как говорится «фиг то с ним» что лежит vCenter, оно конечно плохо, но … можно ковыряться, проблема в том, что при отваливании WebClient’a переставали делаться бэкапы. А вот это уже начинает пахнуть керосином.

После двух дней копания и лазания по форумам выясняться следующая картина:

  • проблема и на VCSA и на Windows vCenter Server примерно одинаковая;
  • в основной массе ответов  лечение сводится к перезапуску сервисов.

но после анализа всех статей/постов (штук 20 точно перелопатил) пришел к выводу, что проблема в связке vCenter + Postgres

Итак, как решаем эту беду:

  1. открываем файл лога postgresql-XX.log и находим там «замечательную» строку:

2. подключаемся к базе postgres, для этого с командной строке вводим, шкафы для огнетушителей на заказ

cd "C:\Program Files\VMware\vCenter Server\vPostgres\bin"
psql -d VCDB -U vc
С нас потребуют пароль, который можно взять в файле c:\ProgramData\VMware\vCenterServer\cfg\vmware-vpx\vcdb.properties

vcdbprops

3.  выполняем команду :

DELETE FROM vc.vpx_vm_virtual_device where id='4018' and device_key='3002';

id и  device_key берем из лога postgres(пункт 1)

4. все, перезапускаем сервисы vCenter ну или сам сервер и 3 дня полет нормальный. Все бэкапы есть и все хорошо


чем пользовался при работе
1. https://forums.veeam.com/vmware-vsphere-f24/veeam-b-r-causes-vcenter-6-5-0b-sdk-webservices-to-crash-t42161-15.html — процедура Lpg лечение в Киеве

2. http://www.virtually-limitless.com/vsphere-6-0/interacting-with-the-vpostgres-database-in-vsphere-6-0/

3. https://communities.vmware.com/thread/556490


ESX 6.5 BUG

В общем обновились мы до ESX6.5

Жили какое то время — долго и счастливо, все настроили. НО потом перенесли туда более нагруженные VM, подтянули свежие хосты и в опа … PSOD.

Раз в +/-12 часовPSOD, на хостах которое отработали все эти месяцы. По 4 сервера в кластере вылетали, в общем треш.

Да, HA отрабатывал безупречно, но перезагрузки VM всех бесили. Все сервера HP DL 560G8, памяти от 256 Gb, в остальном все идентично.

бились с пару дней, в итоге сделали следующие:

  1. нагруженные VM выделил в отдельный кластер;
  2. В GOOGLE было найдено, что проблема с драйвера которые HP вшивает в образ. Поэтому решили взять оригинальный образ VMWARE и переставить его на паре хостов.

Но после еще дня копания нашел замечательную статейку —  https://kb.vmware.com/selfservice/microsites/search.do?language=en_US&cmd=displayKC&externalId=2148123.

и как ее продолжение — http://h20565.www2.hpe.com/hpsc/doc/public/display?docId=c05378386

при этом в них есть упоминания о разных сервера HP, но только не про DL560G8.

но был взяли патч —

в командной строке

esxcli software vib install -d "/tmp/ams-esxi6.5-bundle-10.6.2-2.zip"
Installation Result
   Message: The update completed successfully, but the system needs to be rebooted for the changes to be effective.
   Reboot Required: true
   VIBs Installed: HPE_bootbank_hpe-ilo_650.10.0.2-2.4240417, HPE_bootbank_hpe-smx-limited_650.03.11.00.13-4240417
   VIBs Removed: HPE_bootbank_hpe-ilo_650.10.0.1-24.4240417, HPE_bootbank_hpe-smx-provider_650.03.11.00.17-4240417
   VIBs Skipped: HPE_bootbank_amshelper_650.10.6.0-24.4240417, HPE_bootbank_hpe-cru_650.6.5.8.24-1.4240417, HPE_bootbank_hpe-esxi-fc-enablement_650.2.6.10-4240417

и все, работаем уже 4 дня. Пока полет нормальный.


Hyper-V cannot be installed: A hypervisor is already running.

Hyper-V cannot be installed: A hypervisor is already running.

Если попробуем включить роль через PowerShell получим аналогичную ошибку:

Install-WindowsFeature –Name Hyper-V -ComputerName <computer_name> -IncludeManagementTools -Restart

Но саму роль Hyper-V в виртуальной машине на Windows Server включить можно. Делается это средствами утилиты по обслуживанию образов DISM.exe. Если вы используете Windows 8 как гипервизор, то потребуется скачать еще и пакет Windows Assessment and Deployment Kit (ADK) for Windows 8.

Выполняем следующие команды в консоли:

DISM /Online /Enable-Feature /FeatureName: Microsoft-Hyper-V
DISM /Online /Enable-Feature /FeatureName: Microsoft-Hyper-V-Management-Clients


ESX 6.5 and DVSwitch with LACP

Очень не плохое видео


VmWare ESX Monitoring(1)

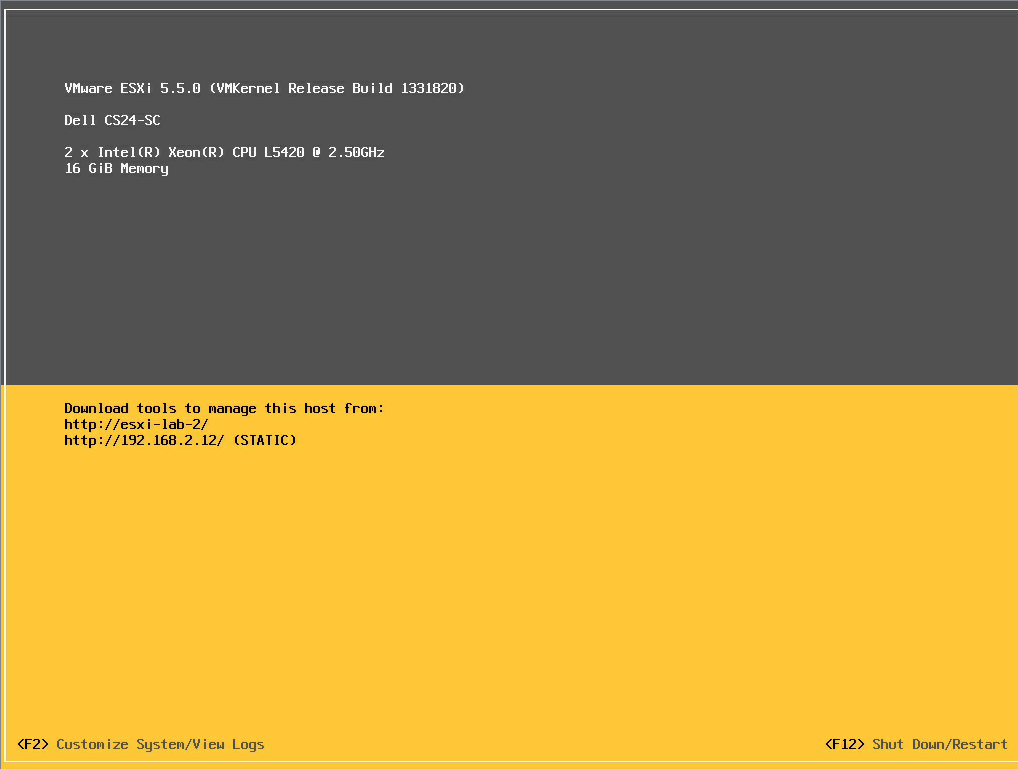
берем скрипт. ставим пакет и качаем его, подробнее тут — https://habrahabr.ru/company/simnetworks/blog/241605/

Скрипт написан на языке программирования Python, требует библиотеку PyWBEM. Под ОС Linux Debian и Ubuntu она устанавливается через стандартные системные репозитории:
apt-get install python-pywbem

Синтаксис запуска «check_esxi_hardware.py» весьма прост:
check_esxi_hardware.py -H XXX.YYY.WWW.ZZZ -U root -P XXXXXXXX

В ответ вы получите краткий отчет о состоянии здоровья сервера:
OK - Server: Supermicro X9DR3-F s/n: 0123456789 System BIOS: 3.0a 2013-07-31

описание работы самого скрипта тут: https://www.claudiokuenzler.com/nagios-plugins/check_esxi_hardware.php#CommandDefinition

Definition of the parameters

Short Long Description
-H —host Hostname or IP address of ESX/ESXi server
-U —user Username to check (must be a local user on target host)
Note: If you don’t want to use your root user, use this workaround
Use file:/path/to/.file to use first string as username
-P —password Password for given user
Use file:/path/to/.file to use second string as password — this won’t show the password in servers process list
-C —cimport CIM port (default 5989)
-V —vendor (hw_type) Define the vendor of the server: auto, dell, hp, ibm, intel, unknown (default)
auto Plugin tries to determine hardware itself by using CIM entries
dell For DELL servers use dell as hw/vendor type
hp For HP servers use hp as hw/vendor type
ibm For IBM servers use ibm as hw/vendor type
intel For some servers using Intel motherboards this might be needed
unknown If no hw/vendor type was given, unknown will be used (like auto)
-i —ignore Ignore given list (comma separated) of elements
-v —verbose Verbose/detailled output for debugging
-p —perfdata Include server perfdata for graphics like PNP4Nagios or Nagiosgraph
-I —html Add web-links to hardware manuals for Dell servers (use your country extension)

————

Usage

./check_esxi_hardware.py -H esxi-server-ip -U username -P mypass [-C -V -i -v -p -I xx]

./check_esxi_hardware.py —host esxi-server-ip —user username —password mypass [—cimport —vendor —ignore —verbose —perfdata —html xx]

./check_esxi_hardware.py -H esxi-server-ip -U -P file:/path/to/.passwdfile [—vendor —ignore —verbose —perfdata —html xx]

./check_esxi_hardware.py -H esxi-server-ip -U file:/path/to/.passwdfile -P file:/path/to/.passwdfile [—vendor -i -v -p —html xx]

Examples:

./check_esxi_hardware.py -H 10.0.0.200 -U root -P mypass -V dell -p -I de
./check_esxi_hardware.py —host esxiserver1 —user root —password mypass —vendor hp —perfdata
./check_esxi_hardware.py —host esxiserver2 —user root —password mypass —vendor dell —html us
./check_esxi_hardware.py -H esxiserver1 -U root -P file:/root/.esxipass -V dell
./check_esxi_hardware.py -H esxiserver1 -U file:/root/.esxipass -P file:/root/.esxipass -V dell
./check_esxi_hardware.py -H esxiserver1 -U root -P mypass -V dell -i «IPMI SEL»

————

Command definition in your commands.cfg:

# ‘check_esxi_hardware’ command definition
define command{
command_name check_esxi_hardware
command_line $USER1$/check_esxi_hardware.py -H $HOSTADDRESS$ -U $ARG1$ -P $ARG2$ -V $ARG3$
}

Command definition in your commands.cfg with optional parameter:

# ‘check_esxi_hardware’ command definition
define command{
command_name check_esxi_hardware
command_line $USER1$/check_esxi_hardware.py -H $HOSTADDRESS$ -U $ARG1$ -P $ARG2$ -V $ARG3$ $ARG4$
}

Command definition in your commands.cfg with password read from file:

# ‘check_esxi_hardware’ command definition
define command{
command_name check_esxi_hardware
command_line $USER1$/check_esxi_hardware.py -H $HOSTADDRESS$ -U $ARG1$ -P file:$ARG2$ -V $ARG3$ $ARG4$
}

Command definition in your commands.cfg with user and password read from file:

# ‘check_esxi_hardware’ command definition
define command{
command_name check_esxi_hardware
command_line $USER1$/check_esxi_hardware.py -H $HOSTADDRESS$ -U file:$ARG1$ -P file:$ARG2$ -V $ARG3$ $ARG4$
}

————

Service check on a HP Server:

# Check HP Server hardware
define service{
use generic-service
host_name esxi1
service_description Hardware
check_command check_esxi_hardware!root!mypass!hp
}

Service check on a DELL Server:

# Check DELL Server hardware
define service{
use generic-service
host_name esxi2
service_description Hardware
check_command check_esxi_hardware!root!mypass!dell
}

Service check on a DELL Server with perfdata:

# Check DELL Server hardware
define service{
use generic-service
host_name esxi2
service_description Hardware
check_command check_esxi_hardware!root!mypass!dell!—perfdata
}

Service check on a DELL Server with password read from file:

# Check DELL Server hardware
define service{
use generic-service
host_name esxi2
service_description Hardware
check_command check_esxi_hardware!root!/home/nagios/.esxipass!dell
}

Service check on a HP Server with user and password read from file:

# Check HP Server hardware
define service{
use generic-service
host_name esxi1
service_description Hardware
check_command check_esxi_hardware!/home/nagios/.esxipass!/home/nagios/.esxipass!hp
}

Service check on an IBM Server:

# Check IBM Server hardware
define service{
use generic-service
host_name esxi3
service_description Hardware
check_command check_esxi_hardware!root!mypass!ibm
}

Service check on an IBM Server where System Event Log alerts should be ignored :

# Check IBM Server hardware
define service{
use generic-service
host_name esxi3
service_description Hardware
check_command check_esxi_hardware!root!mypass!ibm!-i «IPMI SEL»
}

————

File handling for user and password (for better security!)
Since version 20110505 it is possible to use a file as password-source. The string in the given file is used as password.
Since version 20110614 the file can be used for both username and password.
This is a big security advantage, because the process on the Nagios server won’t show the username or password in cleartext. If no file is used, these values will be shown in cleartext in the processlist.

Please watch out for the correct usage!

Example 1: You want to use a file (/home/nagios/.esxipass) which contains username and password. Note that two strings are separated by a space:

# cat /home/nagios/.esxipass
root mypass123

# ./check_esxi_hardware.py -H 172.17.16.131 -U file:/home/nagios/.esxipass -P file:/home/nagios/.esxipass -V dell

Example 2: You only want to use a file for the password. Note that there is only one string in the file:

# cat /home/nagios/.esxipass
mypass123

# ./check_esxi_hardware.py -H 172.17.16.131 -U root -P file:/home/nagios/.esxipass -V dell


Error While Binding iSCSI To VMKernel Adapters: IscsiManager.QueryBoundVnics

So when you try to click Properties of the iSCSI adapter to modify certain settings, you see the following error:


Error:


Call «IscsiManager.QueryBoundVnics» for object «iscsiManager-##» on vCenter Server «VC-name» failed


Cause:
This event occurs when ESXi’s internal iSCSI daemon becomes corrupted, requiring a cleanup of the daemon’s files in ESXi.
How to resolve this:
1. Migrate all virtual machines using vMotion to ESXi hosts that are unaffected.
2. Review the existing iSCSI configuration and copy the IQN and adapter settings for your iSCSI software adapter to a text document.
3. Disable the iSCSI adapter.
4. Navigate to the /etc/vmware/vmkiscsid/ directory on your ESXi host and back up the contents of the folder to a safe location.
5. Delete the contents of /etc/vmware/vmkiscsid/
6. Write the changes to the ESXi boot bank using this command:
# backup.sh
7. Reboot the ESXi host.
8. Create a new software iSCSI adapter and configure it as per the backup you saved in step 2.
9. Add the iSCSI port bindings and targets.
That’s pretty much it. You should be good to go.


Relocating modules and starting up the kernel…


I recently upgraded my ESXi boxes from ESXi 5.1 to 5.5, and while I had no issues when installing ESXi 5.1 originally, I did happen to run into a few hiccups with 5.5. The issues were mainly on my Dell CS24-SC servers, but I had no issues with my PowerEdge 1950 GII or 2950 GII servers.

stuck_screen_thumb     On the CS24 servers the ESXi installer would hang indefinitely at “Relocating modules and starting up the kernel…”. After searching around a bit, I foundthis thread. It seems as though the issue is video related, specifically either memory or whether the system is running headless. Apparently some BIOS have options for whether the system is running headless or not, but the CS24’s have no options like this.

In that thread a few users explain how use start up options to tell ESXi to ignore whether the server is in headless mode and force ESXi to continue with the install. One thing to note when entering options during the install or boot, they must be re-entered if the system is rebooted!

Below are the steps to install ESXi 5.5 on a CS24:

1. Boot ISO

2. Press Shift + O during startup of an ESXi 5.5 installation

shift-o

3. Append the boot option: ignoreHeadless=TRUE

ignoreheadless_install

4. Installer should now work – Install, Remove Media, Reboot

loading

5. Upon reboot repeat step 2 (Shift + O, Append the boot option: ignoreHeadless=TRUE)

6. These next few steps are to make the ignoreHeadless=TRUE setting persistent through a reboot…

Once ESXi is booted, press F2 and login

esxi-f2

7. Under System Customization, go to Troubleshooting Options

8. Enable the ESXi Shell and ESC all the way out

enable_shell

9. Back at the main console screen, hit Alt + F1 to access the shell

10. Login and enter the following command:

esxcfg-advcfg --set-kernel "TRUE" ignoreHeadless

esxi_shell

11. Type exit

12. Hit Alt+F2 to go back to the main ESXi screen

13. Complete! Don’t forget to disable the ESXi Shell if you don’t want it on!

Links:


ESX HP VAAI

в ESXi 5.5 убрали поддержку VAAI, по этой причине перестали работать уже созданные дисковые массивы на HP P2000 G3.

решение проблемы тут


http://h20566.www2.hp.com/portal/site/hpsc/template.PAGE/public/psi/swdDetails/?spf_p.tpst=swdMain&spf_p.prp_swdMain=wsrp-navigationalState=idx=%7cswItem=MTX_30e09de4fc7e4498bfd9102a99%7citemLocale=%7cmode=%7caction=driverDocument&javax.portlet.begCacheTok=com.vignette.cachetoken&javax.portlet.endCacheTok=com.vignette.cachetoken


esxcli software vib install -d /tmp/hp_vaaip_p2000_offline-bundle-210.zip


Как изменить IP адрес на ESX Server

Иногда вам может потребоваться изменить IP adress на вашем ESX сервере. Сделать это из графического интерфейса VI клиента невозожмно. Единственным вариантом является выполнение данной операции на консоли ESX server .

1.) Для начала вы должны иметь физический доступ к консоли сервера.

2.) Переведите  ESX хост в Maintenance Mode и отключите его от Virtual Center.

3.) Теперь вы можете подключиться к консоли ESX.

4.) Удалите старый IP адрес (это делается удаление интерфейса vswif): “esxcfg-vswif -d vswif0″ (vsfif0 это интерфейс, который вам необходимо удалить)

удаляем интерфейс

5.) Создайте новый vswif интерфейс с новым IP адресом: “esxcfg-vswif -a vswif0 -p Service Console -i 192.168.0.100 -n 255.255.255.0 -b 192.168.0.255″.

-i новый IP адрес

-n новая маска сети

-b бродкаст адрес

6.) Обновите шлюз по умолчанию. Откройте с помощью nano файл “nano /etc/sysconfig/network”

редактируем шлюз

редактируем шлюз продолжение

Нажмите “CTRL+O” и “ENTER”, затем  “CTRL+Q” для выхода

7.)  Теперь можно перезапустить интерфейс. Выполните команды “esxcfg-vswif -s vswif0″ (это отключит интерфейс vswif0) и “esxcfg-vswif -e vswif0″ (эта команда включит интерфей)

перезапускаем интерфейс

8.) Теперь вам необходимо обновить DNS и файл HOSTS. Запустите команды “ipconfig /flushdns” и “ipconfig /registerdns” на сервере с  Virtual Center. Только после этого вы можете переподключить ESX сервер к Virtual Center.

Вы можете изменить DNS информация и имя хоста в VI клиенте:

01.) Откройте клиент VI, выберите ваш ESX сервер и нажмите вкладку Configuration.

02.) Нажмите DNS and Routing.

03.) Нажмите Properties.

04.) Если вы хотите изменить имя хоста, домен и DNS сервер, нажмите DNS Configuration и введите соответствующие значения.

меняем имя хоста и DNS

05.) Для изменения шлюза, зайдите в вкладку Routing tab

меняем шлюз

06.) Теперь для вступления в силу изменений перезагрузите ESX сервер

перезагрузка ESX

Оригинал статьи: http://www.guruadmin.ru/page/kak-izmenit-ip-adres-na-esx-server


Перенос базы Exchange

Вообщем ситуация такова: хранилище exchane больше 200гб, место на диске заканчивается с умопомрачительной быстротой, «резать» пока возможности нет, т.к. не знаешь сколько это займет. вариант выживания один — перенос базы на новый больший диск, благо все это работает на связке ESX vSphere + OpenFiler, т.е. минус перезагрузка для подключения дисков.

Цель этой заметки — примерно обрисовать время по переносу для «будущих поколений».
Итак, вся процедура проделывается по такой инструкции(полный вариант инструкиции на http://support.microsoft.com/kb/821915):
1. Запустите диспетчер Exchange System Manager.
2. Откройте группу администраторов, содержащую базу данных, которую необходимо изменить.
3. В списке Storage Group щелкните правой кнопкой мыши хранилище почтовых ящиков или общих папок, которое необходимо изменить, и выберите Properties.
4. Откройте вкладку Database.
5. Нажмите кнопку Browse рядом с именем базы данных, которую необходимо изменить, после чего укажите новый диск или папку для файлов.

Примечания.
* При переносе баз данных можно переместить базу данных Exchange (файл .edb) или потоковую базу данных Exchange Streaming (файл .stm), а также обе эти базы.
* Если базы данных по-прежнему присоединены, появится следующее сообщение:
You are about to perform the following operation(s):
— change Exchange database location
To perform the requested operation(s), the store must be temporarily dismounted which will make it inaccessible to any user.

Do you want to continue?
Нажмите кнопку Да, чтобы автоматически отключить базу данных и перенести ее в другое место.
6. Завершив перенос баз данных, подключите их вручную.

Файлы журналов и базы данных можно перемещать в любую созданную папку. Перемещая файлы журналов и баз данных, для сохранения целостности данных можно создать файловую структуру Exchsrvr\Mdbdata, однако делать это не обязательно.

В сухом остатке получаем перенос базы на каналах в 1Гб занял 5 часов….все прошло пучком, базы целы, пользователи довольны.:)